

CATEGORIES


LEAF SPRING
Your Position:Home>>Leaf Spring
How to Install Leaf Springs - Step by Step
2015-11-09 11:44:53
Why You Need To Change Your Springs
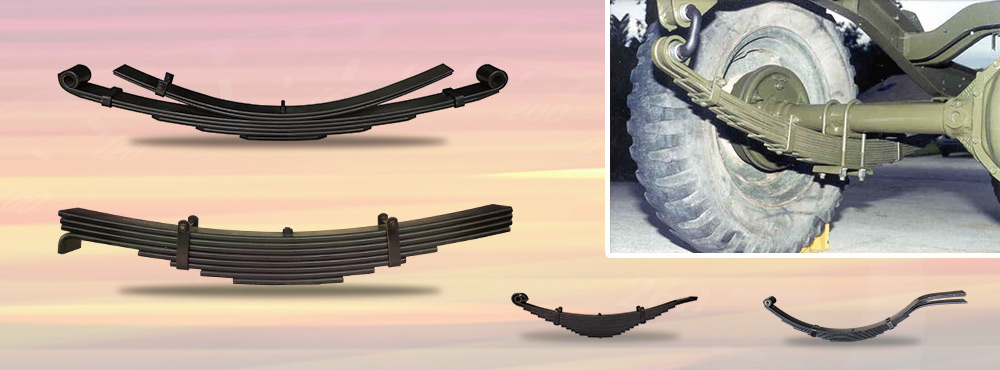
Leaf springs are an important part of your vehicles suspension. They are in place to support the weight of the vehicle, keep the tires on the road by regulating wheelbase lengths while accelerating and breaking, control ride height and controls axle damping. There are many reasons why someone would want to replace their leaf springs. Two reasons you would have to replace them are when your springs begin to get worn out they will start to sag and lower the chassis height of the vehicle, or if the leaf springs breaks or cracks. Also sometimes people just want to upgrade to a heavier duty spring to increase support and keep the vehicle safe and a leaf spring helper will simply not suffice. Once you find the right replacement springs you are going to need to know how to install them. Here is a basic step by step guide to installing leaf springs.
Step 1 - Prepare
Before spring installation you will have to prepare your old suspension. You should begin to prepare at least 3 days before you remove the old springs. The old leaves may be rusted on; you want to make sure that they come off without damaging any parts that need to be reused while swapping the old leaf springs for new ones. To prepare the old suspension soak all of the existing parts (brackets, nuts and bolt) in oil, this will loosen up your springs and make removal a bit easier.
Step 2 - Raise Vehicle
When the leaf springs have been prepared and you are ready to install the new ones, the first step will be to raise the rear end of the vehicle and remove rear tires. Use a floor jack to raise the car so that the rear tires are 3 inches off the ground. Place a jack stand on either side of the car about one foot in front of each rear tire. Lower the floor jack and use it to support the rear axle by placing it under the rear axle gear housing.
Step 3 - Remove Springs
Next you are going to start to remove the old leaf springs. Loosen the nuts and bolts on the leaf spring bracket U-bolts first then remove the U-bolts and place them to the side. Now remove the leaf springs by first removing the eyelet bolts from the bushings. Now you can carefully take down the old leaf springs.
Step 4 - Attach Eye Bolts
As long as you are not doing any type of conversion, such as an Astro van fiberglass to steel spring kit, it is time to begin installation of the new leaf springs. First, place the leaf spring in position and insert mounting bolts and retainer nuts at each end to secure the spring to the hangers. It is recommended to use new nuts and bolts as the old ones may be worn down.
Step 5 - Attach U-Bolts
Make sure all of your mounting bolts are secure by tightening them up. Now place the U-bolt brackets around the leaf spring and rear axle, make sure these are securely in place and the bolts are tight. Many people like to go back and check these for tightness about a week after installation.
Step 6 - Lower Vehicle
Now that you have your new leaf springs installed remove the floor jacks and lower the vehicle. Installing new leaf springs can be a simple job. As long as you follow these instructions the task can be easily completed, safely, in just a few short steps.


